So, Solaris comes with lots of nice tools for querying our SAN HBAs, but the ones we’ve looked at so far are only of any real use when the HBA has a live connection to it.
What about when we want to find the WWN to setup our SAN, before we’ve plugged any fibre in?
picl is a hardware monitoring daemon in Solaris. I first started playing with it on mid-frame and high-end machines (SF6500s and F15ks) where the system controller (SC) talked to picl to do hardware monitoring of a Solaris domain.
We can talk to picl ourselves with prtpicl. We need the verbose option to get something useful, but be warned – this will dump out pages and pages of stuff – so we need to filter it a bit with grep.
root@avalon>prtpicl -v | grep wwn
              :node-wwn  20  00  00  e0  8b  1e  a9  ef
              :port-wwn  21  00  00  e0  8b  1e  a9  ef
              :node-wwn  20  00  00  e0  8b  3e  a9  ef
              :port-wwn  21  01  00  e0  8b  3e  a9  ef
              :node-wwn  20  00  00  e0  8b  80  9c  a8
              :port-wwn  21  00  00  e0  8b  80  9c  a8
              :node-wwn  20  00  00  e0  8b  a0  9c  a8
              :port-wwn  21  01  00  e0  8b  a0  9c  a8
              :node-wwn  20  00  00  03  ba  db  e9  89
              :port-wwn  21  00  00  03  ba  db  e9  89
                      :node-wwn  20  00  00  00  87  83  fd  1c
                      :port-wwn  21  00  00  00  87  83  fd  1c
                      :node-wwn  20  00  00  00  87  84  4a  d8
                      :port-wwn  21  00  00  00  87  84  4a  d8
These are the node WWNs that we’re after, with the first one being c2, the second c3, and so on. The internal controller is last, and we can see the WWNs of the two FC disks that are hanging off it. (Remember, on a V490 we have internal FC-AL disks, not SCSI).
Finally, for our last trick, if we have Solaris 10 01/06 or later, we can use the awesome fcinfo command, which makes all of this very, very easy indeed.
root@avalon # fcinfo hba-port
HBA Port WWN: 210000e08b1ea9ef
        OS Device Name: /dev/cfg/c2
        Manufacturer: QLogic Corp.
        Model: QLE2460
        Type: unknown
        State: offline
        Supported Speeds: 1Gb 2Gb 4Gb
        Current Speed: not established
        Node WWN: 200000e08b1ea9ef
Easy! Another good reason for upgrading to Solaris 10 – there are lots of nice tools and new features like this that make the day to day administration much easier.
In the previous post I listed the ‘long way round’ to find out the WWN from active HBA links in Solaris. The commands I listed before will work on all recent releases of Solaris. If you’re able to migrate to Solaris 10, you can make things easier for yourself.
cfgadm will take a verbose flag, which will print out a listing that includes the full device path. This will definitely work on Solaris 9 and 10 – I’m afraid I don’t have an 8 box to test though.
bash-3.00# cfgadm -lv
Ap_Id                          Receptacle   Occupant     Condition  Information
When         Type         Busy     Phys_Id
c0                             connected    configured   unknown
unavailable  scsi-bus     n        /devices/pci@7c0/pci@0/pci@1/pci@0/ide@8:scsi
c1                             connected    configured   unknown
unavailable  scsi-bus     n        /devices/pci@7c0/pci@0/pci@1/pci@0,2/LSILogic,sas@2:scsi
c2                             connected    configured   unknown
unavailable  fc-private   n        /devices/pci@780/pci@0/pci@8/SUNW,qlc@0/fp@0,0:fc
c3                             connected    unconfigured unknown
unavailable  fc           n        /devices/pci@780/pci@0/pci@8/SUNW,qlc@0,1/fp@0,0:fc
c4                             connected    configured   unknown
unavailable  fc-private   n        /devices/pci@7c0/pci@0/pci@9/SUNW,qlc@0/fp@0,0:fc
c5                             connected    unconfigured unknown
unavailable  fc           n        /devices/pci@7c0/pci@0/pci@9/SUNW,qlc@0,1/fp@0,0:fc
usb0/1                         empty        unconfigured ok
unavailable  unknown      n        /devices/pci@7c0/pci@0/pci@1/pci@0/usb@5:1
usb0/2                         empty        unconfigured ok
unavailable  unknown      n        /devices/pci@7c0/pci@0/pci@1/pci@0/usb@5:2
usb1/1.1                       empty        unconfigured ok
unavailable  unknown      n        /devices/pci@7c0/pci@0/pci@1/pci@0/usb@6/hub@1:1.1
usb1/1.2                       empty        unconfigured ok
unavailable  unknown      n        /devices/pci@7c0/pci@0/pci@1/pci@0/usb@6/hub@1:1.2
usb1/1.3                       empty        unconfigured ok
unavailable  unknown      n        /devices/pci@7c0/pci@0/pci@1/pci@0/usb@6/hub@1:1.3
usb1/1.4                       empty        unconfigured ok
unavailable  unknown      n        /devices/pci@7c0/pci@0/pci@1/pci@0/usb@6/hub@1:1.4
usb1/2                         empty        unconfigured ok
unavailable  unknown      n        /devices/pci@7c0/pci@0/pci@1/pci@0/usb@6:2
If you have Solaris 10 8/07 or later, then you’ll find that the dump_map option to luxadm will take the short notation for an HBA that cfgadm uses.
bash-3.00# luxadm -e dump_map /dev/cfg/c2
Pos AL_PA ID Hard_Addr Port WWN         Node WWN         Type
0     1   7d    0      210000e08b86f840 200000e08b86f840 0x1f (Unknown Type,Host Bus Adapter)
1     ad  23    ad     50060e8014118960 50060e8014118960 0x0  (Disk device)
Again, this all works only if the HBA has a live link – it needs some cable plugged in, and you need to have something listening at the other end. I’ll be exploring how to find the WWN of your HBAs – even if they’re not plugged in – soon, using some other features of Solaris.
When connecting a Solaris machine to a SAN, you’ll usually need to know the WWN of the host bus adapter (HBA). WWNs are a bit like MAC addresses for ethernet cards – they are unique, and they’re used to manage who is connected to what, and what they can see.
The quickest and easiest way to check the WWN is when we have an active HBA. We can use the cfgadm command under Solaris to check our adapter states:
root@avalon>cfgadm -al
Ap_Id                          Type         Receptacle   Occupant     Condition
c0                             scsi-bus     connected    configured   unknown
c0::dsk/c0t0d0                 CD-ROM       connected    configured   unknown
c1                             fc-private   connected    configured   unknown
c1::210000008783fd1c           disk         connected    configured   unknown
c1::2100000087844ad8           disk         connected    configured   unknown
c2                             fc-private   connected    configured   unknown
c2::50060e8014118920           disk         connected    configured   unknown
c3                             fc           connected    unconfigured unknown
c4                             fc-private   connected    configured   unknown
c4::50060e8014118930           disk         connected    configured   unknown
c5                             fc           connected    unconfigured unknown
usb0/1                         unknown      empty        unconfigured ok
usb0/2                         unknown      empty        unconfigured ok
usb0/3                         unknown      empty        unconfigured ok
usb0/4                         unknown      empty        unconfigured ok
So both our controllers, c2 and c4, have active loops. Now we can use luxadm to query the driver and print out the device paths for each port on each HBA:
root@avalon>luxadm qlgc
 Found Path to 5 FC100/P, ISP2200, ISP23xx Devices
 Opening Device: /devices/pci@8,700000/SUNW,qlc@2/fp@0,0:devctl
  Detected FCode Version:       ISP2312 Host Adapter Driver: 1.14.09 03/08/04
 Opening Device: /devices/pci@8,700000/SUNW,qlc@2,1/fp@0,0:devctl
  Detected FCode Version:       ISP2312 Host Adapter Driver: 1.14.09 03/08/04
 Opening Device: /devices/pci@8,700000/SUNW,qlc@3/fp@0,0:devctl
  Detected FCode Version:       ISP2312 Host Adapter Driver: 1.14.09 03/08/04
 Opening Device: /devices/pci@8,700000/SUNW,qlc@3,1/fp@0,0:devctl
  Detected FCode Version:       ISP2312 Host Adapter Driver: 1.14.09 03/08/04
 Opening Device: /devices/pci@9,600000/SUNW,qlc@2/fp@0,0:devctl
  Detected FCode Version:       ISP2200 FC-AL Host Adapter Driver: 1.15 04/03/22
  Complete
This particular machine I’m playing on is a Sun v490, which uses internal FC-AL disks – so the sixth controller port we can see (the ISP2200) is the internal controller for the internal root disks. Why the sixth? Due to the way the V490 initialises itself, the internal controller is tested and configured after all the PCI slots.
Also, if you look at the device path, you can see it’s coming from a different PCI bus – pci@9 as opposed to pci@8
Finally, the FCode and driver version are different, which shows us it’s a slightly different chipset from the other HBAs.
REMEMBER: numbering starts from the top (the first device) down. So:
/devices/pci@8,700000/SUNW,qlc@2/fp@0,0:devctl is c2
/devices/pci@8,700000/SUNW,qlc@2,1/fp@0,0:devctl is c3
/devices/pci@8,700000/SUNW,qlc@3/fp@0,0:devctl is c4
/devices/pci@8,700000/SUNW,qlc@3,1/fp@0,0:devctl is c5
/devices/pci@9,600000/SUNW,qlc@2/fp@0,0:devctl is c1, our internal HBA
We can now use the dump_map option from pci@9 to print out the device map, as seen from each port.
For c2, for example, we would do:
root@avalon>luxadm -e dump_map  /devices/pci@8,700000/SUNW,qlc@2/fp@0,0:devctl
Pos AL_PA ID Hard_Addr Port WWN         Node WWN         Type
0     1   7d    0      210000e08b1ea9ef 200000e08b1ea9ef 0x1f (Unknown Type,Host Bus Adapter)
1     b1  21    b1     50060e8014118920 50060e8014118920 0x0  (Disk device)
And there is our listing of WWNs. The 50060e8014118920 WWN belongs to our SAN device at the other end (note the type of ‘0x0 Disk device’), and the first WWN of 210000e08b1ea9ef is for our HBA.
Note that this just works for cards which have an active connection to a SAN fabric. If we haven’t plugged them in yet, we need to use some lower level Solaris tools, which I’ll be covering in another post.
The Supercomputing 08 trade show is in full swing, and I’ve been blogging about some of Silicon Graphics’ offerings over at Siliconbunny – links at the end. Sun’s John Fowler, who is now in charge of the Systems Platforms group at Sun, after the recent layoffs and re-organisation, popped up at SC08 to give a preview of some high end gear coming down the line from Sun.
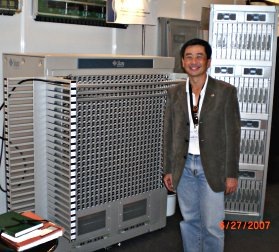
Sun’s Magnum Infiniband switch
Probably the most interesting preview offering is Sun’s upcoming blade server. It has two sockets and squeezes an entire server into each blade. The key thing though is that each blade provides quad data rate (QDR) Infiniband direct off the board – 40 Gb/s throughput makes 10Gb Ethernet pretty laughable, even without taking into account the advantages the Infiniband protocol has over Ethernet.
Current Sun blades use PCI-E cards to provide Infiniband connectivity, which isn’t as fast and takes up extra room on the board.
Sun are also pushing to pre-package HPC solutions. For example, on the back of their announcements of the Storage 7000 Unified Storage System, Sun will be announcing the Sun Storage Cluster. This is a rack of pre-configured storage servers and disks, running Linux and using the Lustre file system.
The Sun Compute Cluster is another bundled solution, this time with an integrated rack of servers, network and software, all pre-configured, ready to be plugged in. Options range from 1 to 8 racks of gear, and are comprised of either 32 X2250 dual-socket servers per rack, or 30 Sun Blade servers.
The point of both of these bundles is to make HPC easy to implement – and to sell. IBM and HP already do something similar, and have had a lot of success with smaller installations.
Sun also announced something which we’ll definitely be seeing more of in our datacentres – their custom water jackets that fit to the back of racks, codenamed Glacier.
If you’re reading this and thinking “What does HPC have to do with me?”, think again. Silicon Graphics said back in 1996 that they wanted their high-end graphics systems to appear in a games console in 5 years (a wish that came true). These sort of lower-end HPC systems not only represent the technologies that we’ll all soon be using in our data centre, but they also make hugely cost effective solutions for larger-scale business problems like data warehouses or ERP. High Performance Computing is no longer confined to government labs and large research centres.
Follow these links to SiliconBunny to read about the Silicon Graphics Molecule concept computer, and SGI’s haul at the HPCwire Reader’s Choice Awards.
As previously posted about, the Solaris install is a bit of a slug due to the way the package manager processes the huge amount of files contained in a package.
Flash Archives (flar files) are one solution to this problem. Let’s say you’ve built a model install – everything is in place, all your custom packages, banners, OE tweaks – the works. Wouldn’t it be nice if you could take an image of that Solaris install, to slap down somewhere else?
Or maybe take point in time image snapshots of an environment, for use by developers to let them quickly roll back to a known previous version of their software?
Flash archives let you do all of this. At their most basic, they’re a way of taking an image of a Solaris install. You end up with a single (large) file, which can then be archived/transferred/restored/whatever.
flars are easy to use – the flarcreate command is all you need:
bash-3.00# flarcreate -n "T2k Sol10 8/07" -x /var/flars -R / /var/flars/sun4v_sol_10_Generic_120011-14.flar
Full Flash
Checking integrity...
Integrity OK.
Running precreation scripts...
Precreation scripts done.
Creating the archive...
2019951681 blocks
Archive creation complete.
Running postcreation scripts...
Postcreation scripts done.

Running pre-exit scripts...
Pre-exit scripts done.
bash-3.00#
The syntax is pretty straightforward:
- -n specifies the name you’re giving to your flar
- -x says what files and directories to exclude – in this case, we don’t want to include the directory where we’re creating and storing our flars
- -R says where the root of the flar will be – in this case we’re imaging a full Solaris install, so we want to start from /
- and the final part is the full path and filename of the flar we are creating
One thing that it’s important to remember, is that flarcreate will follow symlinks and mount points. If you have a 100gb /export/home, it will try and add that to your flar. This may not be what you want – especially if you’re creating a Solaris image for Jumpstart – so flars are best created from single user mode, when the system is idle and nothing unnecessary is mounted or running.
Another important point to note is that flars are hardware class dependant. If I create an image of a sun4v Solaris install (in this case, a trusty Sun T2000) then the flar will just contain the kernel and driver files for sun4v. If you try and boot a sun4u box (like a Sun V440) it’s going to go horribly wrong.
If you want to use flars to Jumpstart machines, you’ll need to have a master flar image for each machine hardware class you have in your estate – we can find this out with the uname command:
bash-3.00# uname -m
sun4u
We can use flar info to query a flar file to see what it contains:
bash-3.00# flar info sun4v_sol_10_Generic_120011-14.flar
archive_id=afe30bf4ebb65085a54c5179a6f62a1c
files_archived_method=cpio
creation_date=20081118211329
creation_master=sunt2k-001
content_name=solaris_10_4v_Generic_120011-14
creation_node=sunt2k-001
creation_hardware_class=sun4v
creation_platform=SUNW,Sun-Fire-T200
creation_processor=sparc
creation_release=5.10
creation_os_name=SunOS
creation_os_version=Generic_120011-14
files_compressed_method=none
files_archived_size=4039903362
files_unarchived_size=4039903362
content_architectures=sun4v
type=FULL
And that’s it, basically. There’s not much to it, and it’s pretty simple to use. flars function in pretty much the same way as a normal archive file – we can use the flar command to list files inside the archive and find out more about the archive itself.
